
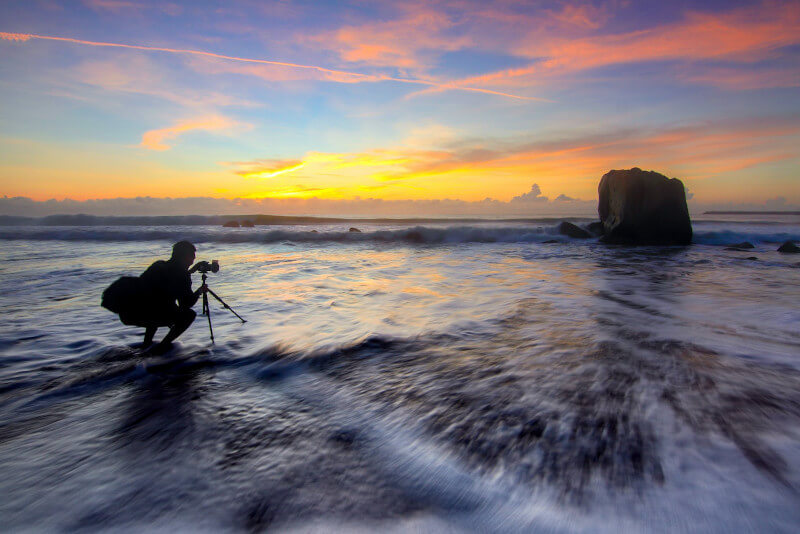
When we go to the beach, we usually want to take some amazing pictures, not only to remember our trip but additionally to show off to our friends and family. The sea and the coast are stunning, but the photographs could use more impact, wouldn’t you agree? Don’t worry; I’ll show you the ropes as a photographer and help you take some breathtaking shots of the ocean. Light, structure, shutter speeds, planning, the pursuit of spontaneity, different kinds of coasts, and more are all covered in the following pages.
What Exactly is Oceanic Photography?
Photographs with the sea or ocean as a major subject matter are considered seascapes, a subgenre of landscape photography. In addition, there is the sea, the sand, the sheer cliffs, the stone pools, the sea life. There are many similarities between coastal photography and other forms of nature photography. There is often only a fraction of a second between a successful and unsuccessful landscape shot.
Everything in the sea is constantly changing; the waves are never the same, the splashes are never the same, and the scene is never the same from one second to the next. This is true of all landscapes, but it is especially true of oceanic ones. While an extended exposure normally only impacts the clouds in a natural scene, here it additionally impacts the water, dramatically altering the scene’s aesthetic.
If you’re interested in learning how to take photographs of beautiful beach sunsets or magnificent sunrises, keep reading! I’ll do my best to avoid inundating you with theory and focus instead on concrete examples.
Safety For Seascape Photography
Safety precautions should be taken when photographing any scene, but they are especially important when photographing seascapes. You should start by checking the waves and tidal predictions. Your security is at risk due to these forecasts. You wouldn’t want to risk being trapped on an island if the water level rose while you were standing on a rock. The article’s planning part is buried deep into its body.
Seaside Hazards To Watch Out For

Soggy Stones
Keep an eye open for those slick rocks. If they’re wet and it hasn’t rained recently, it’s a sign that the wave may return at some point. In particular, when the tide is rising. Take your time and survey the area to determine a secure stance.
Rock Climbing
Take your time and make your way cautiously through the piled-up boulders along the coast. But when you must leap great distances, prod the mark using the tripod first. Even though it appears to be a stone golem, it could be quite unstable.
Algae
Several different kinds of aquatic plants exist. Some standard green and brown plants are fine, but black algae should be avoided at all costs. The slippery black aquatic plants outweigh any benefits they might provide. You’d have a hard time just standing on them, let alone walking. The use of these hues is specific to South Africa; elsewhere, they may seem different.
Wild Waves
There may be waves of varying sizes. Keep your eyes open for oncoming waves, and be prepared to make a hasty exit if necessary.
Behavioural Safety

Don’t Ever Give the Water the Finger
Whenever I turn my back on the ocean for even a second, I swear it looks at me, and then a huge wave crashes down on me! Keep your focus on your surroundings and don’t ever lose sight of the water, even if you’re just kidding about it. Having such unrestrained force so close to you makes it difficult to truly unwind and unburden.
Do Not Use the Tripod to Hold Your Camera
Before you move, make sure the camera is no longer attached to the tripod. If you trip unexpectedly or flail your arms, you might hit it.
Replace the Lens Cap
Put the camera’s lens cover back and then leave. It’s the same deal: if you lose your footing, you might accidentally bump it.
Turn Off the Camera While It’s Not in Use
Stop taking pictures and put away the camera if you’re not using it. It’s not the battery life, but rather the possibility of survival in an unexpected downpour. It could get washed away by a wayward wave or smashed toward a rock pool. Do not switch on the camera if there is any chance that water may have gotten inside. Instead, you should have it fixed professionally.
Surf and High Water
Before venturing out, make sure you understand what the ocean is doing by checking the swell and tide information. Stay away from danger. No good can come of it.
Strategic Advice and Planning Methods
Navigational Compass Landscape
Having a plan is crucial. The importance of this cannot be overstated. Planning a landscape photography shoot can lead to many spectacular photo ops and seaside scenes. Time is saved and disappointment is minimised with careful preparation. Do your study and investigate the location from the convenience of your own home first. Check out the web:
- Look up pictures of the location using Google.
- 500px image search on the Google Maps app
- Besides Flickr, are there any other places to host digital photographs online?
- Find some of the best local photographers and check out their websites.
Check the Tides and Plan Ahead of Time
Some places are more appealing at low tide, while others are usable only when the tide is high. So, keep that in mind as you make your plans. The hour of the day is also relevant. Think about whether the early morning light or the end of the day would look better with the scene.
Weather Forecasts

Clouds and Weather Storms
Exploring new coastlines requires careful consideration of the wave and tidal conditions. The swell determines the magnitude of the waves, with some waves having the potential to be twice as large as the average (rogue waves). Keep it in mind, and prioritise safety. Some locations are optimised for a certain water level, so knowing when low or high tide is crucial.
At low tide, the shore is even flatter, so the water stays in place for longer, which is ideal for photographing reflections. What works best in the rocky region is site-specific, so you’ll have to do some exploring to find out. It is possible to enjoy the cliff views regardless of the tide level.
Composition
Why Does Composition Matter
The first step is to compose the piece. Composing a photograph is not something you can “quickly cover.” This topic is so important that entire classes, books, and articles have been written about it. There are many principles and examples, but you’ll still find something unique in each excellent composition you read. It’s hard to stick to every rule, and regardless of whether you do, that doesn’t guarantee a well-composed photo. Picture composition is difficult to master because it calls for training and an innate sense of what looks well together. So, to help you get started right away, I’ll run through some of my preferred photographing landscape structure strategies. These guidelines should be sufficient for addressing the essentials. Maybe I’ll write another piece devoted entirely to framing issues.
The Fundamentals of Composition

The Image Framework
There’s a center ground, foreground, and backdrop in this picture. A sea in the background, some clouds, and maybe some rocks in the distance are usual for seascapes. The focus is typically on a topic that falls between two extremes. And a sandy beach or a group of rocks can be seen in the foreground. One has to be resourceful and experiment. Things to photograph along the coast abound. Focus on a large wave foreground. Get wet and make the churning water your foreground. Avoid the middle ground at all costs and instead adopt a more extreme viewpoint. So many options exist. Keep in mind that depth and dimension are essential for drawing attention to the picture.
Photographic subjects (people, rocks, trees, etc.) should be positioned along the lines of the grid, while important lines (horizon, clouds, river, etc.) should be positioned at the intersections.
Compositional Line Format
There is a lot of ground to cover in this short chapter. Just because I say “establishing a line” doesn’t mean it has to be a perfectly straight, continuous line. What I imply is simply to arrange the parts in such a way that the eye is drawn along a preconceived path. Compositionally, a pair or three parallel rocks are equally as effective as the edge of a cliff moving in the same direction.
The Rule Of Thirds
In photography, framing is governed by a wide variety of guidelines and methods. The most well-known is the “Rule of Thirds,” however it’s fundamentally flawed. A more straightforward formulation regarding the Golden Ratio principle. Anyway, it’s easy to employ; just place the lines of significance on the photo’s thirds. In both cases, horizontal and vertical lines are subject to this criterion. The viewfinder of the majority of cameras features an internal frame that divides the scene into thirds. Put the horizon or any other important lines that you have close to a grid line and turn it on. Important details must also be positioned at grid intersections.